Saturday, August 31, 2024

Kindest Expressions and Mystery Stamping

Have I got a great sketch for you! I used it for my Mystery Stamping yesterday during Fun Friday.  I was perusing Pinterest and stumbled on Dawn's Stamping Thoughts and her fun website.  She has a section dedicated to awesome card sketches.  In case you want to follow along and be surprised on the final result I will post the video and supply list first, then below the video I will share the cards I made using this sketch.  The first one is from the video but the other two are the same card sketch but stepped up a little bit.  😀  

If you want to create the card following the video here are the supplies you will need.

Details:

  • Card base:  Card stock 8 1/2" x 5 1/2"
  • Layer #1: Card stock or DSP 1 1/2" x 4"
  • Layer #2: Card stock 1 1/4" x 3 1/2" 
  • Layer #3: Card stock 1" x 3"
  • Layer #4: Basic White or Very Vanilla  2 1/8" x 3 1/2"
  • Stamp sentiment, Coordinating ink, Embellishments, and Adhesives of choice/Deminsionals


Here are some pictures of the cards I made using this layout and then you will see the sketch itself.  Links to all the products will be listed with the exception of the pattern paper Snowy Scenes, used on two cards, because it will become available for purchase starting Wednesday, September 4, 2024. (Just a few days away!) 


This first card uses Poppy Parade & Petal Pink.  The pattern paper is from the new September - December 2024 Mini catalog.  It is called Snowy Scenes and will be available to purchase starting September 4, 2024.  I use Poppy Parade ink and Petal Pink dots from the Rainbow Dots adhesive backed embellishments.   The sentiment is from Kindest Expressions and the rectangle was from the Deckled Rectangle die set. 


The second card uses Boho Blue and Country Lace pattern paper.  I stepped it up by adding an additional layer (4 1/8" x 5 3/8") of Boho Blue embossed with the Eyelet 3D embossing folder.  I used the Kindest Expressions stamp set and Boho Blue ink on the Deckled Rectangle.  Petal Pink Rainbow Dots was used to embellish the sentiment.


This last card using the sketch is starting to get us into the holiday spirit.  I stepped this card up by using the Versa Mark technique (stamp on card stock with Versa Mark ink) to create a background of snowflakes.  The stamp set was Sparkling Snowflakes.  The card base is Garden Green and the pattern paper is from Snowy Scenes.  The pattern paper has a multi shades of Pool Party and White with Garden Green snowflakes.  The other layers also use Garden Green and Pool Party.  The sentiment is from the Iconic Imagery stamp set.  Again, I used the Rainbow Dots embellishments in Pool Party. 

As you can see this is a great simple layout that can be stepped up very easily by adding extra stamped images or an embossed layer.  

Here is the sketch in black and white. 


Have a great time creating! 

Here is the list of products used.


Wednesday, August 28, 2024

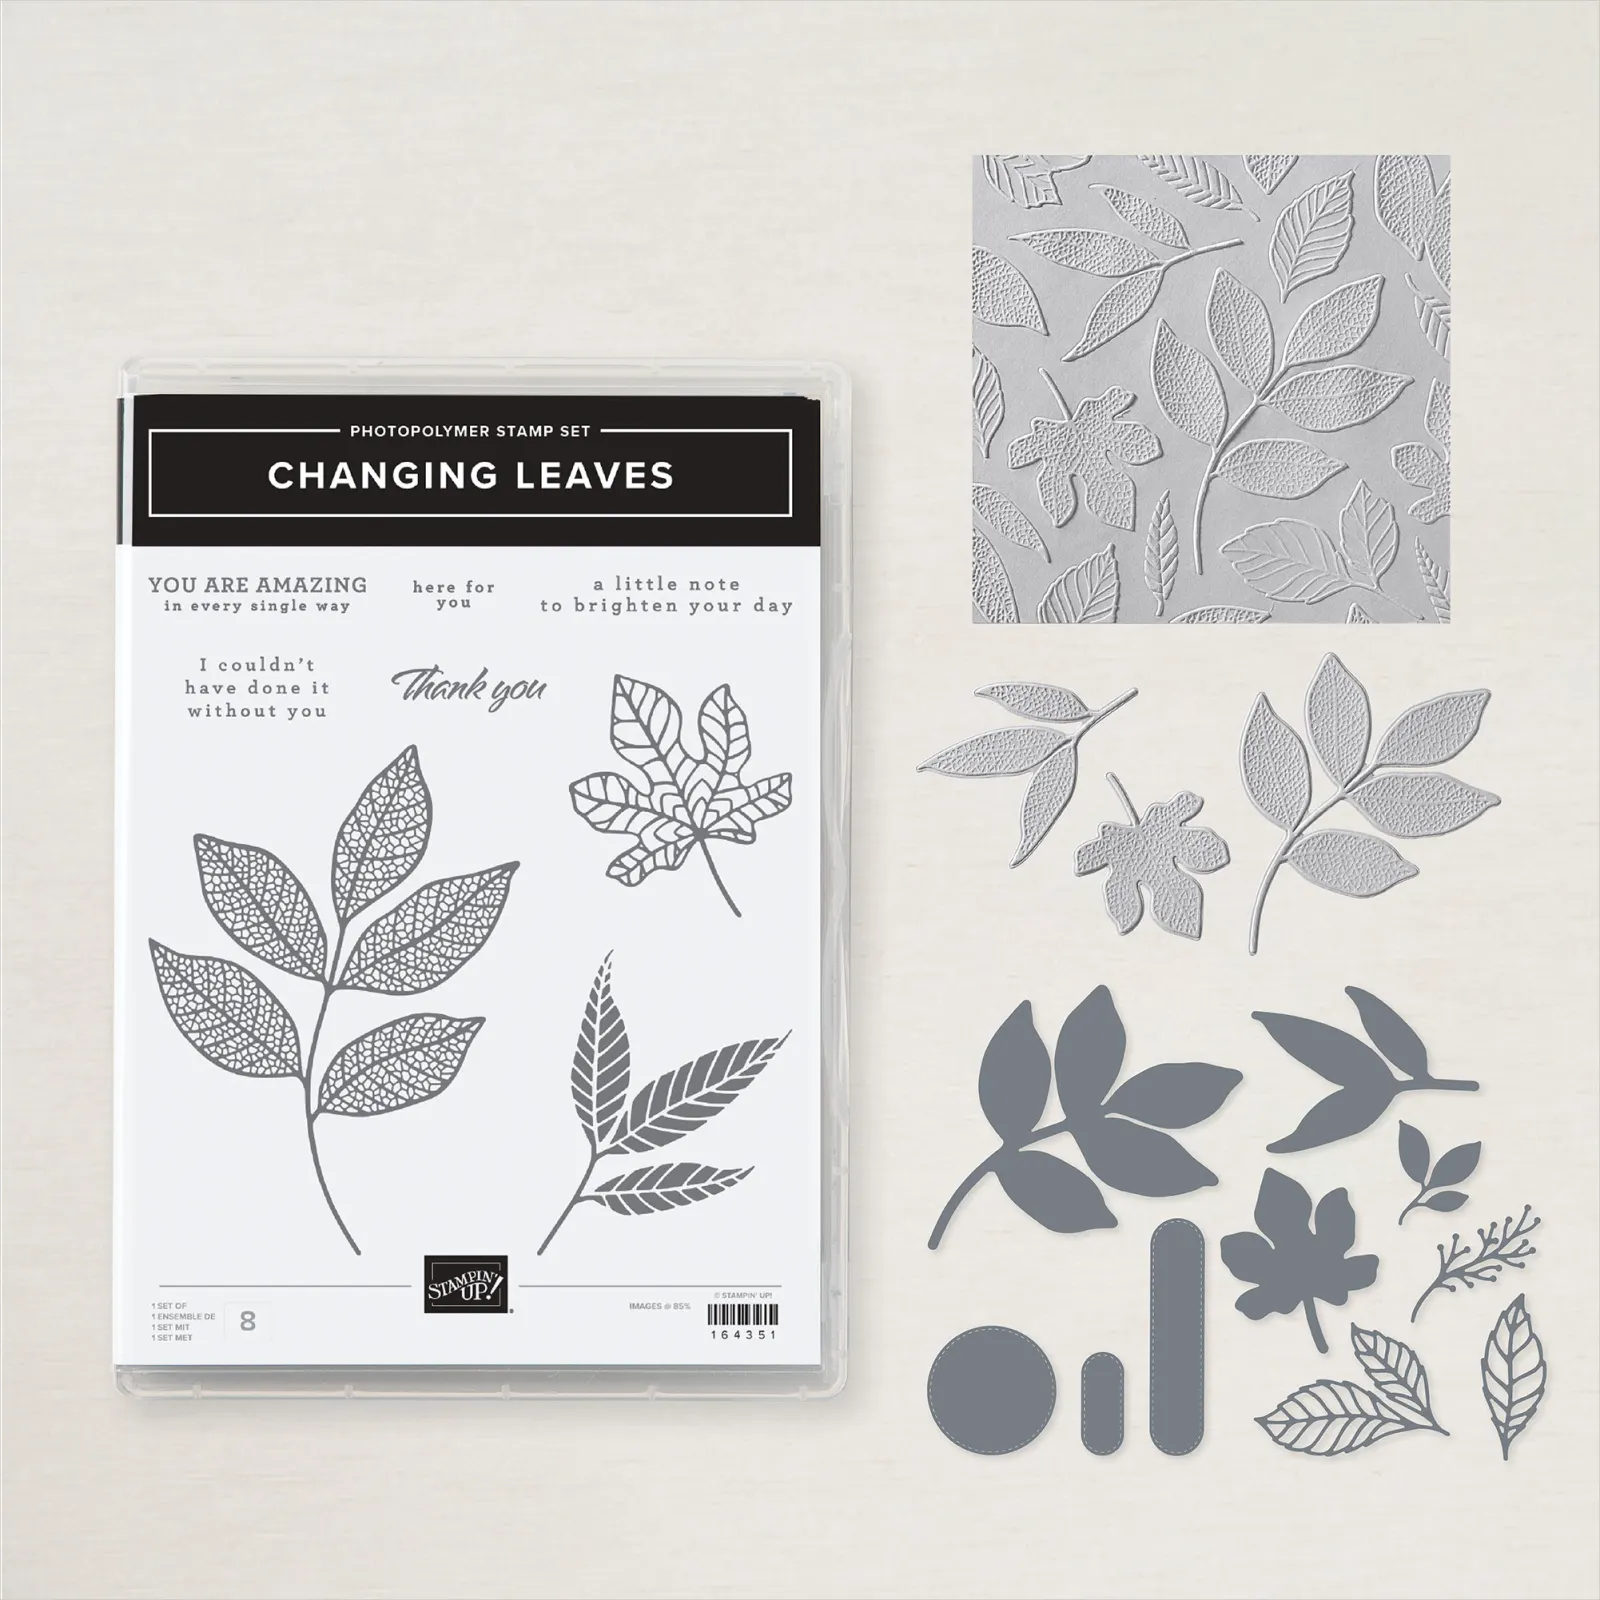
Stampin' Up! Changing Leaves

What a fun bundle to play with!  Tammy and I chose this to be our focus for our Teach it Tuesday with Tammy & Jennie. Tammy went non-traditional colors for her card so don't forget to check out her video.  I on the other hand decided to go traditional Autumn colors; Pumpkin Pie, Daffodil Delight, Old Olive, Pecan Pie & Early Espresso. The sketch was from Paper Play Sketches.


Details for this card:

  • Card base: 8 1/2" x 5 1/2"  scored at 4 1/4"
  • Layer #1: 5 3/8" x 4 1/8" 
  • Layer #2: 3" x 2" (2nd to smallest Deckled Rectangle)
  • Layer #3: 3" x 2" (Smallest Deckled Rectangle)
  • Layer #4: 4" x 2" (Embossed Banner)

Here is the video for more information about this card and bundle.


Watch the replays for this card or for Tammy's card here:
Products used:

Tuesday, August 27, 2024

Autumn is in the air with Changing Leaves

Join us today for Teach it Tuesday with Tammy & Jennie we will be showing you ways to use the Stampin’ Up!® bundle Changing Leaves.  We will both be going live on our Facebook business pages today.  


I will be sharing my card with you today at 4pm PT at Stampinn with Jenn.

Tammy will be sharing her project at 11am PT at Cards by TLC

Hope you can join us.  If you miss our lives you can always catch the replays on our blogs tomorrow!  


Saturday, August 24, 2024

Double the Fun Take to the Sky Cards

During my Fun Friday live I had fun showing you ways to use the Take to the Sky patterned paper from Stampin’ Up!®.  I made two cards; one a fun fold and the other a standard card with a fun cut.  The fun fold was inspired by Verna Mullens from Stampin' Notes. I followed the basic format but made a couple of changes to the card.  The second card was inspired by a card sketch I found on Dawn's Stamping Thoughts.  

Here are the details for the cards.  If you are a visual learner like me you can check out the video of how I made the cards, it is posted below.  


Details (follow these measurements, I think I made a mistake or two stating measurements in the video)

  • Card base: 11" x 5 1/2"  (score at 1 3/4", 3 1/2", 5 1/4" & 7")
  • Interior base (if used): 3 3/4" x 5 1/4" 
  • Interior Fold (center two panels): 3 1/4" x 5 1/4" (score at 1 5/8")
  • DSP: 5 1/4" x 1 1/2" (2 pieces)
  • Hinge: card stock: 5 7/16" x 1 1/4" (score at 2 3/4")  &  Coordinating DSP: 5 7/16" x 1" (score at 2 3/4")


Details

  • Card base: 11" x 4 1/4" (scored at 5 1/2")
  • Layer #1: DSP 4" x 4"
  • Layer #2: Deckled Circles (4th smallest) 
  • Layer #3: Deckled Circles (3rd smallest)
  • Ribbon: 4 1/2" long
  • Interior Layer #1: 4" x 4"
  • Interior Layer #2: 3 1/2" x 3 1/2" 
  • Interior Layer #3: DSP 1" x 4" 


Video: 


Products Used: 


Wednesday, August 21, 2024

Take to the Sky - Sketch Challenge

During our Teach it Tuesday lives yesterday Tammy and I shared the cards we created using a sketch from the 2024-2025 Annual Catalog, page 22.  I will post the sketch below with measurements, thank you to Frenchie from www.frenchiestamps.com for providing us with the measurements for this sketch and the others in the catalog.  

When creating this card I used the Take to the Sky designer series paper. It is a fabulous pattern paper that showcases old bi-planes, clouds and the beautiful blue sky.  Some of the patterns don't have airplane themes but are in colors that make great masculine cards.  


Here are the details for the card.  Below them you will find the sketch with the measurements for the specific layers.

Details

  • Card base: 4 1/4" x 11 - scored at 5 1/2"
  • Layer #1: 4 1/8" x 5 3/8" 
  • Layer #2: 4" x 5 1/4" 
  • Layer #3: 4 1/2" x 2 1/4" (I used 2 1/2")
  • Layer #4: 3" x 2 3/4" 
  • Layer #5: 1 1/4" x 2" 


Here is the video:


Watch the replays for this card or for Tammy's card here:

Tammy:  


Jennie:


Product used:


Tuesday, August 20, 2024

Teach It Tuesday - Sketch Challenge

Today's Teach it Tuesday with Tammy & Jennie is all about layout!  We will be giving you ideas of what to do with sketch #5 from page 22 of the 2024/2025 Annual Catalog.  Join me today at 4pm PT/ 5.pm MT/ 6pm CT/ 7pm ET on my Facebook business page Stampinn with Jenn.   The measurements for the sketch below were created by France Martin of Frenchiestamps.   


Hope you can join me!  Don't forget to check out Tammy's live at 11am PT today.  I've seen her card and it is beyond cute! You can find her live on her Facebook Business page Cards by TLC . 


Wednesday, August 14, 2024

Unbounded Beauty Fun Fold

Looking for a card that gives you space for lots of signatures! This fun fold is perfect for just that.  This card gives you extra space for signatures or a special note.  This card was inspired by Jackie Bolhuis, The Klompen Stamper.  I shared this card with you during Teach it Tuesday with Tammy and Jennie yesterday afternoon. 


Below you will find the details for making this card and a link to the video on my YouTube Channel.


Details: 

  • Card base: 5 1/2" x 8 1/2" scored at 4 1/4" & 2 1/8" 
  • DSP: 2" x 5 1/4" (2 pieces) 
  • Layer #1: 5" x 2 1/2"
  • Layer #2: 4 1/2" x 2" 
  • Interior Card stock:  White 10 1/2" x 4" scored at 5 1/4" 


Watch the replays for this card or for Tammy's card here:

Tammy:  


Jennie:


Products used in this card:


Tuesday, August 13, 2024

Teach it Tuesday - Designer Series Paper

Today's Teach it Tuesday with Tammy & Jennie is all about double sided pattern paper!  We will be giving you ideas of what to do with the different Designer Series Paper (aka double sided pattern paper).  Join me today at 4pm PT/ 5.pm MT/ 6pm CT/ 7pm ET on my Facebook business page Stampinn with Jenn.

Today I will be using Unbounded Beauty DSP and my friend Tammy will be using Wildly Flowering, so don't miss her Facebook live at 11 am PT on her business page Cards by TLC.


Saturday, August 10, 2024

September - December 2024 Mini Catalog Sneak Peek!

On September 4th Stampin' Up! the September-December 2024 Mini Catalog, what many of us call the holiday catty, will be going live.  As a demonstrator I have the opportunity to see the catalog early and also the opportunity to order early. If you are interested in how you too can have early access to the catalogs contact me at stampinnwithjenn@gmail.com .   

I received my pre-order just a couple of days ago and would like to share with you some of the items found in the catalog along with a few samples.  If you don't have a demonstrator you can request a catalog from me here.


I am loving the Book Treat Boxes, the DSP and so many other things. Here are a couple of examples.


Hang an Ornament

Hang an Ornament Bundle 
Cherry Cobbler
Shaded Spruce 
Wild Wheat


Book Treat Boxes

Book Treat Boxes 
Snowy Scenes DSP
Hang an Ornament (Sentiment)
Red & White Adhesive Back Peppermints 


Watch the my video to see these and some other fun products in the September - December 2024 Mini Catalog.


Wednesday, August 7, 2024

Color Combo Challenge

During our Teach it Tuesday with Tammy and Jennie this week we created cards using four colors we wouldn't normal put together; Daffodil Delight, Melon Mambo, Pool Party and Lemon Lime Twist.  What a great combination. 


These bright colors work together better than I imagined and now this combination of colors are on my go to list!  I used these colors with one of my all time favorite bundles, Spotlight on Nature.  


Details:

Card Stock: 8 1/2" x 5 1/2" Melon Mambo & Basic White 5 1/4" x 4" (2)
Stamp set: Spotlight on Nature
Inks: Tuxedo Black, Daffodil Delight, Pool Party, Lemon Lime Twist
Markers: Melon Mambo
Tools: Spotlight on Nature Dies
Embellishments: Iridescent Adhesive Backed Discs & Wink of Stella
Miscellaneous:  Adhesive Foam Sheets


Watch the replays for this card or for Tammy's card here:

Tammy:  


Jennie:


Products used in this card:


Tuesday, August 6, 2024

Teach It Tuesday - Color Combos!

 Today's Teach it Tuesday with Tammy & Jennie is all about Color!  We will be giving you ideas of what to do with the color combo of Daffodil Delight, Melon Mambo, Lemon Lime Twist & Pool Party.  Join me today at 4pm PT/ 5.pm MT/ 6pm CT/ 7pm ET on my Facebook business page Stampinn with Jenn.


Make sure you check out Tammy's Teach it Tuesday today on her Facebook business page, Cards by TLC at 11am PT/ 12pm MT/ 1pm CT/ 2 pm ET!

If you can't join us we will be sharing the videos on our blogs and YouTube channels on Wednesday. 


Saturday, August 3, 2024

Fun Friday - Mediterranean Blooms

So Mediterranean Blooms is growing to be one of my favorite pattern paper in the 2024-2025 Stampin' Up! Annual Catalog.  I absolutely LOVE the multi blue patterns and I am even starting to really like the citrus sides of the paper.  I really love how the citrus sides look on the cards we made during Fun Friday yesterday.  The sketch I used was found on Pinterest and it is from Stampin with Diane.  You will find the sketch below with the all the measurements and details for the cards I made in the video.  


Details 
  • Card base:  8 1/2" x 5 1/2" or 11" x 4 1/4" (scored in half)
  • Layer #1: 4 1/8" x 5 3/8" 
  • Layer #2: 1" x 3"
  • Layer #3: 2 3/4" x 3"
  • Layer #4: 2" x 3 7/8"
  • Layer #5: Die cut shape approximately 2 1/2" 


Products used for these cards


Sneak a Peek: January - April 2025 Mini Catalog, January Online Exclusives and 2025 Sale-a-bration!

Well it is that time of year when as an Independent Stampin' Up! demonstrator I get to see all the new products from the upcoming Januar...